
Automated Dispensing Robot Videos

A World of Robotic Dispensing and Assembly Solutions

How to Choose a Heavy Duty Cantilever Racking System?

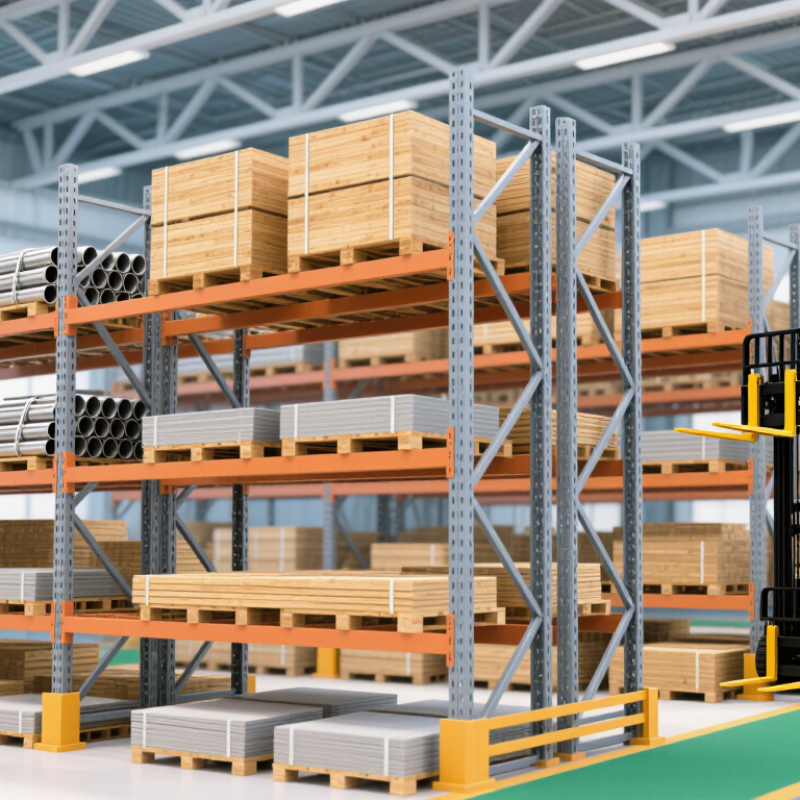
Choosing a Heavy Duty Cantilever Racking System starts with the materials you need to store, not a catalogue picture. Steel pipe, timber packs, and sheet stock place different demands on rack arms and uprights. Measure the longest and heaviest items, then note how they will be lifted and placed. A forklift needs room to approach; a bundle needs support across its length. Small details matter.

Compare the required load capacity with the manufacturer’s ratings for each arm, column, and complete rack. Check how loads will be distributed, since a high total capacity does not mean every arm can carry the same weight in every arrangement. Confirm that the floor can support the system and that anchoring suits the site. For outdoor storage, ask about finishes and exposure to weather. These checks are practical, but they are not a substitute for a qualified assessment where site conditions are uncertain.

A good layout should leave clear access while using the available height and floor space well. Measure twice. Even a careful plan can miss a turning aisle or a future change in stock. That is worth admitting early. This guide explains the main selection factors, common trade-offs, and questions to raise with a supplier, so your system fits both the materials on hand and the work your team actually does.
How to Choose a Heavy Duty Cantilever Racking System?

Measure Long-Load Dimensions, Weight, and Required Storage Clearances

How to Choose a Heavy Duty Cantilever Racking System?

Measure each long load at its widest and longest points, including straps, end caps, and any uneven overhang. Record the weight of each bundle, not just the total shipment. Then map how that weight will sit across the arms. A 6-meter pipe bundle centered on two arms loads them differently from the same bundle supported at several points. ANSI MH16.3-2021 provides design criteria for cantilever rack systems; have a qualified engineer verify the rack configuration and rated capacity. Guessing from upright size alone is not enough.

Clearances matter just as much as capacity. Allow room for the longest load to enter, turn, and rest without striking columns, lights, or neighboring stock. Check forklift mast height, aisle width, and the building’s actual sprinkler layout. NFPA 13 commonly specifies at least 18 inches between stored goods and standard sprinkler deflectors, but requirements can vary with the system and storage arrangement. Confirm the applicable design with a fire-protection professional. A plan can look roomy on paper and still fail at the aisle end.

Tips: Measure twice. Note the longest load, heaviest bundle, and required handling equipment before requesting a layout. Include a small operational buffer where site conditions permit; loads are rarely as tidy as drawings suggest.

Calculate Per-Arm and Per-Column Loads for the Heaviest Stored Item

How to Choose a Heavy Duty Cantilever Racking System?
Calculate Per-Arm and Per-Column Loads for the Heaviest Stored Item

Start with the heaviest item, not the rack’s headline capacity. Record its weight, length, and how it sits on the arms. A 1,200-pound bundle supported evenly by two arms places about 600 pounds on each arm. Real loads are rarely perfect. Uneven spacing, overhang, or a shifted bundle can increase the force on one arm.

Then calculate each column’s cumulative load. If four levels each hold one such bundle across two columns, each column carries about 2,400 pounds of stored product, before adding rack self-weight. Do not divide the total by every arm in the aisle. Only count the arms and columns that actually support the item. ANSI/RMI MH16.3, the industry specification for cantilevered storage racks, provides engineering requirements for rack design and use. Its framework reinforces why component capacity and the full loaded configuration both matter.

Check the supplier’s load tables against your exact arm length, spacing, and column arrangement. OSHA 29 CFR 1910.176(b) also requires stored materials to remain stable and secure against sliding or collapse. A tidy spreadsheet can still miss a real-world detail. Small difference. Big consequence. Have a qualified rack engineer review unusual loads, especially long or off-center items, before loading the system.

Check Cantilever Design and Load Ratings Against ANSI MH16.3-2023

When choosing a heavy-duty cantilever rack, ask for design documentation against ANSI MH16.3-2023, the industry standard for cantilever storage racks. Do not compare systems by arm capacity alone. Request rated loads for each arm, column, and complete rack configuration, including the stated load position and spacing. A load shifted toward an arm’s tip can create a different demand than one placed close to the column. Small detail. Check that the proposed ratings match your actual product lengths, weights, and storage pattern. Ask a qualified rack designer to confirm assumptions; a generic capacity sheet may not describe your installation.

Look for drawings, load-rating calculations, installation requirements, and clear limits on permitted configurations. Verify floor anchorage and slab suitability with the project’s structural professional. The U.S. Bureau of Labor Statistics reported 2.4 recordable injury and illness cases per 100 full-time workers in private industry in 2023; this broad figure is not rack-specific, but it underscores why safe handling deserves attention. See its 2023 Employer-Reported Workplace Injuries and Illnesses data. Also review the standard’s edition and applicability with the rack supplier, since a rating is only useful when its assumptions fit the site. I would not treat a neat label as proof by itself. Check the paperwork, then inspect the installed rack against it.

Verify Floor Capacity, Anchors, and Seismic Loads Under ASCE 7-22

A heavy-duty cantilever rack transfers load through narrow base plates, not across the whole floor. Check slab thickness, reinforcement, joints, and soil support against the rack supplier’s maximum base reactions. A 10,000-pound arm load is not automatically shared equally by four columns; uneven loading and rack geometry can increase individual reactions. ACI 360R-10, the industry guide for slab-on-ground design, emphasizes evaluating the slab and its support conditions together. Small details matter. A floor’s overall rating alone cannot confirm local capacity beneath each upright.

For seismic design, use site-specific mapped values rather than a generic “earthquake zone.” ASCE/SEI 7-22 provides the seismic hazard parameters and load criteria; its ASCE Hazard Tool can return values such as Ss and S1 for a project location. Apply the relevant seismic design category and load combinations, then verify rack bracing, base plates, anchors, and concrete breakout capacity. ANSI MH16.1-2023 supplies rack-specific design and testing criteria that complement the broader ASCE provisions. Anchor checks should include embedment, edge distance, spacing, and cracked-concrete conditions. The awkward part: a rack may pass a gravity-load check and still fail under seismic uplift or overturning. Have a qualified structural engineer review the actual rack layout, anchor details, and floor records before installation.

How to Choose a Heavy Duty Cantilever Racking System? — Verify Floor Capacity, Anchors, and Seismic Loads Under ASCE 7-22

Use the project-specific information below to screen a proposed system. Example values are illustrative inputs only, not design limits or approval criteria. Have a qualified structural engineer verify the rack, slab, anchors, and seismic design for the actual site and governing codes.

Design dimension Project data to collect Illustrative example or check What to verify
Stored material weight Maximum weight per bundle, including packaging, attachments, and any handling fixtures. Example input: 1,200 lb per bundle. Confirm the maximum—not the average—operating load. Check the planned number of bundles per arm and level against the rack supplier’s documented load ratings and the engineer’s design loads.
Arm loading and projection Arm length, load position, number of arms, and whether the load is uniformly distributed or concentrated. Illustration: a 2,400 lb resultant acting 24 in (2 ft) from the column creates a 4,800 lb-ft moment at that arm connection, before applicable design factors. Confirm arm bending, connection capacity, column demand, and whether the actual load placement matches the rated configuration.
Rack layout and height Rack height, bay spacing, column spacing, number of arms per column, aisle arrangement, and single- or double-sided configuration. Record dimensions in inches or feet on a dimensioned plan; do not rely on a nominal layout alone. Obtain the rack reactions and overturning demands for the exact layout and loading pattern. A double-sided arrangement is not automatically balanced.
Base reactions and bearing Maximum compression, uplift, shear, and moment at each base plate for applicable load cases. Request a reaction schedule from the rack designer. Reaction values vary with rack geometry, loading, bracing, and seismic design. Use the reactions to check slab bearing, local bending, punching or breakout concerns, and load transfer to the supporting structure or soil.
Existing floor slab Slab thickness, concrete strength, reinforcement, joints, condition, subbase information, and any known loading restrictions. An 8 in slab thickness, for example, is only one input; thickness alone does not establish allowable rack capacity. Verify slab capacity for the actual base reactions, anchor forces, joint locations, and support conditions. Review drawings and investigate the slab where records are incomplete.
Anchor layout and concrete condition Anchor type and diameter, embedment, spacing, edge distance, base-plate hole pattern, concrete strength, and cracked-concrete assumptions. Provide the proposed anchor schedule and base-plate drawing; do not select anchors from diameter alone. Check tension, shear, combined effects, concrete failure modes, reinforcement conflicts, and installation requirements under the adopted building code and applicable anchor provisions.
Site seismic inputs Project location, risk category, site class, mapped seismic parameters, and any geotechnical information required for the site. Example record: “Site Class D” is an input to confirm, not a default assumption. Mapped values must be determined for the project location. Have the engineer establish the applicable seismic design parameters and design category in accordance with ASCE 7-22 and the locally adopted code.
Seismic rack design Rack system classification, design method, bracing, stored-load assumptions, force-resisting components, and applicable seismic coefficients. ASCE 7-22 seismic forces cannot be selected from rack height alone; the site and system details matter. Confirm applicable ASCE 7-22 provisions, system parameters, load combinations, drift or displacement demands, and the load path from rack to anchors and slab.
Installation and operating controls Floor flatness, rack plumbness, aisle clearances, impact exposure, load labels, inspection plan, and installation tolerances. Mark maximum load per arm and per rack section using the approved design data. Confirm installation matches the approved drawings and establish procedures for damage reporting, periodic inspection, and prompt unloading of damaged components.

Selection rule: Do not approve a heavy-duty cantilever rack based solely on a quoted rack capacity or a general floor-load rating. Final acceptance requires compatible rack reactions, verified slab and anchor capacity, and a site-specific seismic design review.

Confirm Safe Loading and Stability Practices Under OSHA 1910.176(b)

Before loading a heavy-duty cantilever rack, obtain its rated capacity and confirm whether limits apply per arm, level, or column. OSHA 1910.176(b) requires stored materials to remain stable and secured against sliding or collapse; it does not set rack-specific capacities. Keep bundles within the rated limits, distribute them evenly, and avoid concentrating weight at an arm’s tip. Center the load’s weight near the upright. Secure long stock with suitable restraints, and keep projecting ends clear of aisles. Small details matter.

Check that braces, baseplates, anchors, and arms show no visible damage or movement. After a vehicle strike or a changed layout, pause loading until a competent person assesses the rack. The U.S. Bureau of Labor Statistics reported 2.4 recordable injury and illness cases per 100 full-time-equivalent workers in private industry in 2023, in its Survey of Occupational Injuries and Illnesses. That figure is not a rack-failure rate, but it underscores why storage controls deserve attention. Set and document inspection intervals, and train workers to report bent components promptly. A quick visual check helps, but it cannot replace capacity records or a proper assessment.