
Automated Dispensing Robot Videos

A World of Robotic Dispensing and Assembly Solutions

7 Tips for Choosing the Right Fiber Disc

Choosing the right Fiber Disc can make the difference between a clean, controlled finish and a workpiece marked by excess heat. The best choice depends on the material, the task, and the grinder being used. Steel, stainless steel, and wood do not respond to abrasives in the same way. A disc that cuts quickly on one surface may clog, wear down, or leave deep scratches on another.

Small details matter. Grit size affects both material removal and surface finish, while abrasive type and backing influence durability and flexibility. Disc diameter and the grinder’s speed rating must also match the tool’s specifications. These details can seem routine, yet overlooking them may waste discs or damage a part. Not just grit.

A practical selection starts with the intended result: fast stock removal, weld blending, or a smoother finish before coating. Then check compatibility, inspect the disc for damage, and use a suitable dust-control setup and protective equipment. Follow the disc and tool manufacturers’ instructions, especially for operating speed and mounting. There is no single perfect disc for every job; even experienced operators can default to a familiar choice when the material has changed. That habit is worth questioning. The following seven tips offer a clear way to compare options, avoid common selection mistakes, and choose a Fiber Disc that fits the work rather than relying on guesswork.
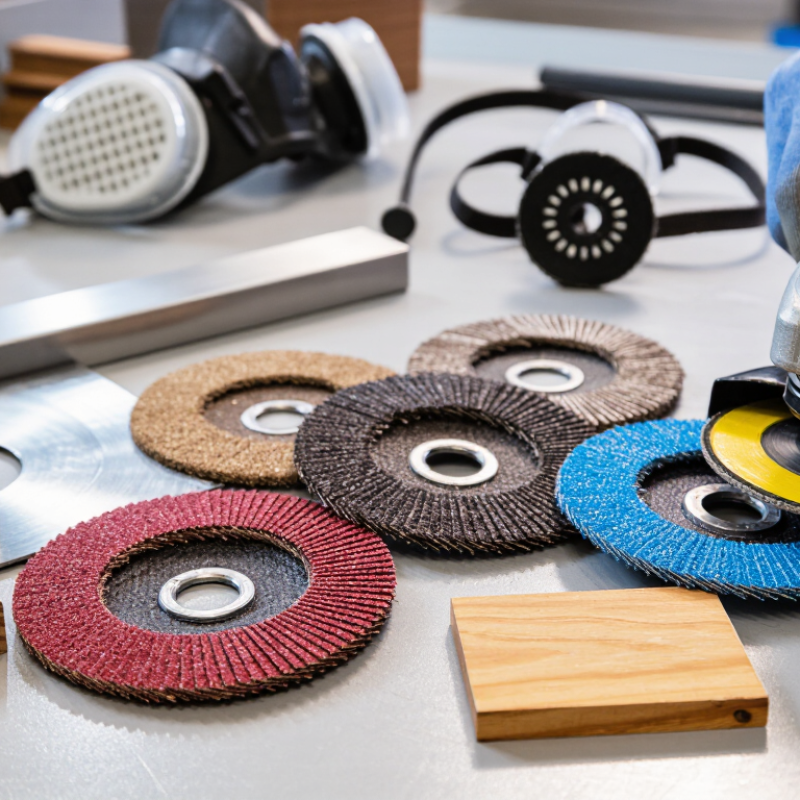
7 Tips for Choosing the Right Fiber Disc

Understand Fiber Disc Types and Their Applications

Fiber discs combine abrasive grains with a firm vulcanized-fiber backing, making them useful for controlled grinding with an angle grinder. The grain type changes how a disc cuts. Aluminum oxide is a practical choice for routine work on steel. Zirconia alumina suits heavier stock removal and can last longer under pressure. Ceramic grains cut aggressively, but they work best when the operator maintains steady movement. Small details matter.

Tip: Match the disc to the material and task. Use a coarser grit to remove weld marks or stubborn scale, then switch to a finer grit to smooth the surface. Silicon carbide can suit nonferrous metals, though the workpiece and finish requirements still matter. A common mistake is choosing grit by habit. The right grade may take a test pass to confirm.

Tip: Check the backing pad, disc rating, and grinder speed before use. The disc must fit the pad and stay within its marked maximum speed. Keep the tool moving across the surface; dwelling in one spot can create heat, gouges, or uneven scratches. Inspect the disc for cracks or wear, and use the grinder’s guard and suitable eye and face protection. Results vary with pressure and technique, so a small test area is useful.

Match the Disc Abrasive to the Workpiece Material

Fiber discs cut differently depending on the abrasive grain and the metal beneath them. For mild steel, aluminum oxide is a dependable general-purpose choice for blending welds and removing light rust. Zirconia alumina can suit heavier stock removal, especially when steady pressure keeps the grains cutting. On stainless steel, a ceramic abrasive may remove material quickly, but excessive pressure can create heat and discolor the surface. Keep the disc moving.

Aluminum needs a different approach. Its soft, sticky surface can load an abrasive, leaving shiny patches instead of clean cuts. Choose a disc designed to resist loading, and use light, even passes. A clogged disc may look usable. It often is not. Nonferrous metals and plastics can also benefit from silicon carbide, particularly when a finer, controlled finish matters.

Match grit to the task as carefully as grain type. Coarse grits remove material faster but leave deeper scratches; finer grits refine the surface and may struggle on scale or thick welds. Test a small area first, then inspect the scratch pattern under good light. Feel the difference. Disc life is not a perfect guide: a worn disc can still cut, while a fresh one may be wrong for the material. If heat, loading, or uneven scratches appear, pause and reconsider the abrasive, grit, and pressure.

Select the Right Grit for Each Grinding Stage

7 Tips for Choosing the Right Fiber Disc
Select the Right Grit for Each Grinding Stage

Grit choice should follow the metal, the defect, and the finish you need. Coarse discs remove weld crowns and heavy scale quickly, but they can leave deep scratches. Start with the least aggressive grit that still cuts steadily. If the disc skates or loads with metal, the grit may be too fine, or the pressure may be too high. It happens.

For a staged process, a fabricator might begin around P36–P60 for heavy stock removal, then move to P80–P120 to refine scratches before finishing with finer grades. These are practical starting points, not fixed rules. The Federation of European Producers of Abrasives (FEPA) publishes particle-size data for P-grades under ISO 6344; for example, its table lists nominal median particle sizes near 538 micrometres for P36 and 125 micrometres for P120. A jump from coarse to fine can leave visible grooves behind. Check the work under a bright, angled light.

Keep each step consistent. Use light, even passes, and overlap them slightly across the surface. Wipe away dust before changing grits; stray coarse particles can scratch a finer finish. Test the sequence on a small area first. Oddly, the “right” grit sometimes needs a second look: alloy, disc wear, and tool speed all affect the result. FEPA’s grading data helps compare particle sizes, but it cannot replace a trial on the actual workpiece.

7 Tips for Choosing the Right Fiber Disc - Select the Right Grit for Each Grinding Stage

Tip Grinding Stage or Task Typical Starting Grit Abrasive Type to Consider Selection Guidance
1. Match grit to material removal Heavy stock removal or deep rust removal 24–36 Zirconia alumina or ceramic alumina Coarse grits cut aggressively and leave deeper scratches. Use them when fast removal matters more than a refined finish.
2. Use a coarse grit for welds Weld bead reduction and substantial edge grinding 24–40 Zirconia alumina or ceramic alumina Choose a grit suited to the amount of weld to remove. Avoid removing excess base material, and check that the disc and backing pad are rated for the tool speed.
3. Step down for blending Blending welds and reducing coarse-grit scratches 40–60 Zirconia alumina, ceramic alumina, or aluminum oxide Move to a finer grit after the main high spots are removed. Keep the disc moving to reduce uneven marks and localized heating.
4. Choose a medium grit for general preparation Surface preparation, light scale removal, and general deburring 60–80 Aluminum oxide for general-purpose work; zirconia alumina for more demanding metal grinding A medium grit balances stock removal and surface refinement. Confirm that the chosen abrasive is suitable for the workpiece material.
5. Refine the finish with finer grits Scratch refinement and preparation for a smoother finish 80–120 Aluminum oxide or another abrasive specified for the material and finish requirement Finer grits remove less material and generally leave shallower scratches. They will not efficiently erase deep marks left by a much coarser grit.
6. Consider the workpiece material Grinding steel, stainless steel, or non-ferrous metals Select grit by task; commonly 36–80 for grinding and blending Zirconia alumina or ceramic alumina for many steel applications; silicon carbide may suit some non-ferrous materials Abrasive suitability varies by alloy and operation. For stainless steel, use products explicitly suitable for stainless and follow recommendations to limit heat and contamination.
7. Check the disc and tool setup Before every grinding operation Use the grit required for the task Any suitable abrasive with a compatible fiber backing Verify disc diameter, arbor fit, backing-pad compatibility, and maximum operating speed. Inspect discs for damage and follow the tool and disc safety instructions.

Note: Grit ranges are typical starting points, not fixed rules. The best choice depends on the material, disc construction, tool, pressure, and required finish. Follow the abrasive manufacturer's product guidance and applicable safety procedures.

Check Disc Size, Backing, and Attachment Compatibility

Start with the grinder’s approved disc diameter, not the size that happens to be on the shelf. A disc that is too large may exceed the tool’s rated speed or interfere with its guard. Check the spindle opening as well; the arbor must fit snugly, without forcing or improvised spacers. Small mismatch, real risk.

Backing changes how a fiber disc behaves. A rigid backing pad supports firm pressure and flatter contact, while a more flexible one can follow slight curves. Match the pad’s diameter and rated speed to the disc and grinder. Inspect the pad face, too: deep grooves, cracks, or a warped edge can cause uneven wear. A worn pad can make a new disc track poorly, so the disc may not be the whole problem.

Attachment matters just as much. Some discs use a center hole and retaining nut; others use a threaded or quick-change hub. Confirm the attachment type and thread direction in the tool and disc instructions before mounting. Keep contact surfaces clean, seat the disc flat, and tighten only as specified. Test at a safe distance with the guard in place. If vibration persists, stop and recheck compatibility rather than leaning harder. It is easy to blame technique.

Consider Tool Speed, Work Conditions, and Safety Needs

Tip: Match the disc’s maximum rated RPM to the grinder’s no-load speed. Never assume a smaller disc makes an incompatible tool safe. Check the label and backing pad before mounting. A disc that runs too fast can fail; a slow tool may cut poorly and tempt excess pressure. Tip: Choose grit and disc type for the material, finish, and pressure you can control.

Work conditions matter. On a weld, a coarse disc may remove material quickly, but it can leave deep scratches that need another pass. For stainless steel, keep discs dedicated to that material to reduce contamination. Dust, heat, and vibration also change the job. Use extraction where practical, and pause if the disc loads, chatters, or the workpiece becomes too hot to handle.

Safety needs are not optional. NIOSH’s Criteria for a Recommended Standard: Occupational Noise Exposure (1998) recommends limiting exposure to 85 dBA over an eight-hour workday, using a 3-dB exchange rate. Grinding can be loud, so wear suitable hearing protection and eye protection, and secure the workpiece. I still catch myself checking grit before RPM; that order deserves a rethink. Inspect discs for damage, and stop if vibration increases.

7 Tips for Choosing the Right Fiber Disc

Consider tool speed, work conditions, and safety needs.

At the same spindle speed, a larger disc has a higher peripheral speed. Values shown are calculated for an illustrative 8,500 RPM and are not disc speed ratings. Always check the disc’s marked maximum RPM and ensure it meets or exceeds the tool speed. Also choose the abrasive and grit for the workpiece, inspect the disc before use, and wear appropriate protective equipment.